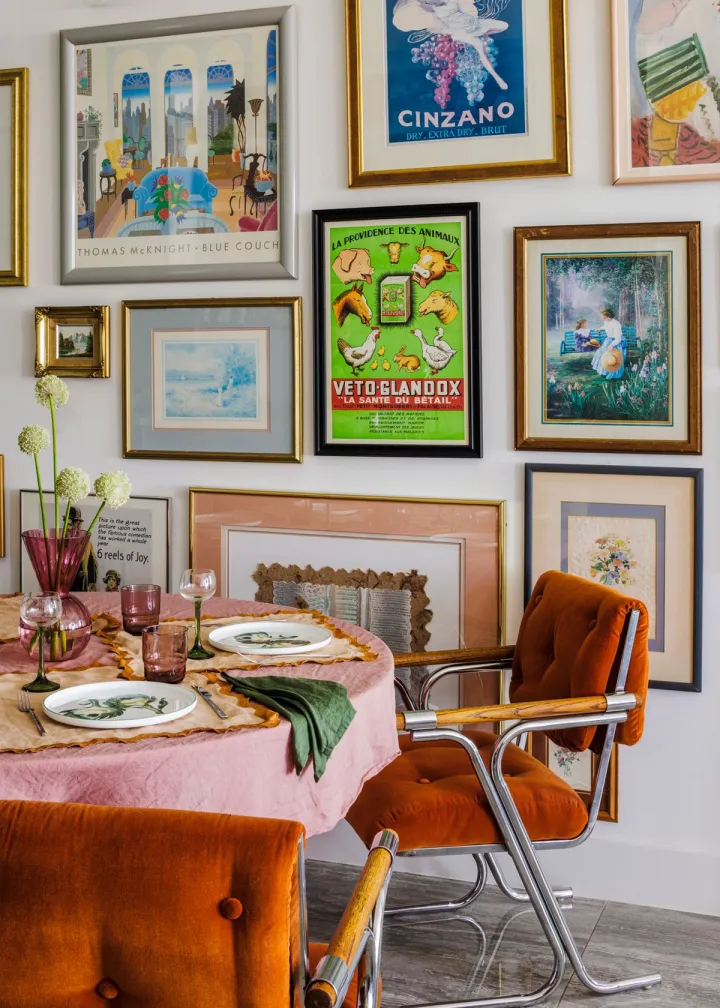
Elevate your at-home gallery wall with these DIY hacks.
How to Mix and Match Your Art to Create the Perfect 'Salon-Style' Hang
Elevate your at-home gallery wall with these DIY hacks.
One of our favourite things to do is collect artwork. And when we say favourite things, we might mean addictions. We love unearthing new and emerging artists to support, and we love purchasing a variety of pieces to hang in our homes. The only thing reigning us in is a lack of wall space.
Are you anything like us? Then you might want to try incorporating a portrait gallery-style hanging space in your home. This style, known as 'salon-style' hanging, is based on a trend that was first initiated in the chicest apartments way back in 17th France. The idea was to collect as many pictures as you could and hang them all at once, both to showcase your taste and patronage of fine art but also to fill your life with creativity. The style continued over the centuries and has reemerged in recent years as a popular interior design trend. Everyone from Emily Ratajkowski to Ginnifer Goodwin has incorporated a salon-style wall in their homes.
The mix is key: you need a variety of different sizes, shapes, styles, and frames to perfect a salon portrait gallery in your home. But what else do you need?
Here are our top tips for achieving this interior design trend for yourself.
1. Find a space
Salon hangs can take up a full wall or they can comprise just a few small pictures. So it really is up to you to think about where you want to create your gallery. Anywhere and everywhere is possible, we’ve seen salon-style hangs in living rooms, hallways, kitchens, bathrooms, home offices, and bedrooms.
The point is to figure out the best space to showcase a selection of art and to think about the mood you might want to have there. That way, you can best curate the pictures you want to hang and think about how you are going to group them.
2. Mix and match
Like we said earlier, the mix is the most important thing. When thinking about your salon space you need to make sure you keep it interesting by mixing and matching different styles, frames, sizes and colours. Place a tiny black and white line drawing next to a framed retro poster, style a colourful collage next to a simple photo.
Pay attention to the colours of your artworks as well as the frames they are in, the more diverse the better. The idea of a salon hang is to show off your personality, so don’t be afraid to group disparate things next to each other. Lay it all out on the floor to see how it looks together, adding and subtracting pictures as you go until you get your perfect match.
3. Time to measure
The most difficult (and important) part of achieving a salon hang at home is to measure everything up correctly. By laying out all your pictures on the floor, you can get an idea of how they will look on the wall. Now it’s time to map it out: use a tape measure to ensure that everything is hung with at least three centimetres of space between the frames, as this will help give each painting room to breathe.
If you want to triple-check how everything is going to look on your wall you can use some newspaper, cut out in the shape of your pictures, and blu-tack them to see if they all fit together.
Enrich your space with art.
Emma Currie x Bed Threads 'Autumn II' Print Emma Currie x Bed Threads 'Autumn II' Print
Lauren Freestone x Bed Threads ‘Tree Carvings’ Print Lauren Freestone x Bed Threads ‘Tree Carvings’ Print
4. Start big
The first thing you hang, and the focal point of your whole wall, should be the biggest and most important picture. That one goes in the centre, and from there you can work outwards. Make sure that the focal point is hanging in your eye line, which is where it will make the most impression.
From there, you can start grouping smaller pictures next to it. Continue to work from the inside to the outside, hanging each of your salon artworks as you go.
5. The one rule
There’s only one rule with a salon hang, and it is this: Big pictures in the centre. Don’t hang your largest artworks on the outside of your salon, as they will throw off the alignment of your gallery. Keep them in the middle and hang smaller pieces on the edges. This will help your salon feel ‘complete’ and hemmed in, even if you plan to keep adding to it as you go. Happy picture hanging, everybody!